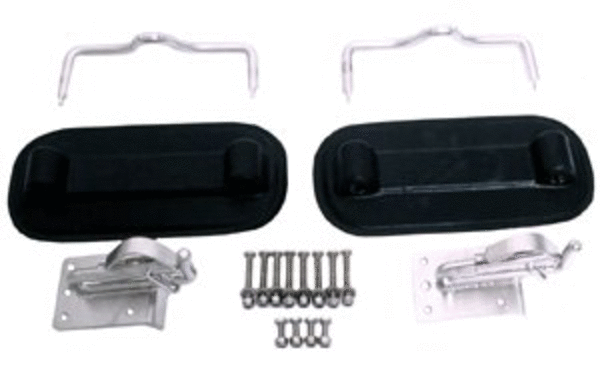
For storing the inflatable on the swim platform (duckboard).
NB: The black pads broke down in UV light so they have been replaced with gray pads which are UV resistant
Snap Davits for soft or hard bottomed Inflatable dinghies for yachts with Swim Platforms with Black Pads.
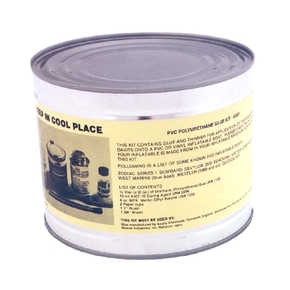
Requires glue, sold seperately.
MOUNTING INSTRUCTIONS:
Weaver Industries highly recommends davits are professionally installed to glue the pads on for you.
Weaver davits have the advantage over alternative brands in that rubber davits are pre-primed
Step 1 - Determine where to locate the davit heads on the swim
platform, beware of support brackets underneath.
Step 2 - Mark the inflatable where the davit heads will line up
with the mounting pad on the dinghy. See figure #1. The pads
should be placed as far apart on the dinghy as possible. The
bottom of the pad goes at the top of the rub strip. The dinghy is
inflated.
Step 3 - The inflatable must be wiped down with the proper
cleaner prior to gluing on the rubber pads. Match the cleaner to
the type of glue you will be using. Incompatible glue and cleaner
will cause the pad to loosen.
Step 4 - Inflatables made from hypalon require a good two-part hypalon glue such as Weaver 2001, Bostick 2405 or Apollo 2990 for proper gluing and Acetone, MEK or Toluene as a cleaner. Boats made from PVC derivative such as the Zodiac will require special urethane glue such as Weaver 3001 or Apollo 3026 and MEK or Acetone cleaner.
CAUTION: Do not glue the pads on in the sun, by the water, or in high humidity. Do not sand or grind the surface of a PVC boat.
Step 5 - (ONLY FOR HYPALON BOATS) Once you have the proper glue you will need to sand the surface of the inflatable where the pads are to be glued. You can do this by using a sandpaper floppy disc you attach to a drill motor or by hand with 60 grit paper. Be very careful not to damage boat.
The surface of the inflatable should now be cleaned with the proper cleaner to remove any trace of finger oils or dust. See figures #2, 3, and 4.
Step 6 - The pads have been ground at the factory and primed with one layer of glue, but be sure and recheck the surface before installing. See figure #5. Wipe down the pads to make sure both are clean! Your goal is to clean all finger oils from surface.
Step 7 - The next step is to cut the bristles short on a paint brush and stir the can of glue to get a good mixture. Mix up your glue with proper ratio of glue to catalysis. The small bottle of catalysis is
proportioned to mix into the whole can of glue. Smaller amounts can be mixed according to directions.
Step 8 - Paint both the pad and the area of the inflatable where the pad will be installed with a thin coating of glue.
Step 9 - Let the glue set until the surface is no longer tacky to the touch (about 10-15 minutes, keep checking). Next spread a second thin layer of glue on both pieces and let set again until the surface is tacky to the touch.
(FOR PVC BOATS ONLY!) Use a hair dryer to warm the surface of the glue on the pad and dinghy. Once warm (not hot) to touch stick pad to dinghy and follow Step 10.
Step 10 - Attach the pad to the inflatable, see figure #8, and rub the air out from under the pad using a hard roller or rounded stick. You may want to deflate the boat to assure a better bond for the pad. It is critical to get all the air out from between the pad and the inflatable and the pad is sealed around the edges.
Step 11 - Once the air is out from under the pad, let the pad set-up for 48 hours. **DO NOT TOUCH IT!!** After 48 hours attach the stainless steel yoke with the 3/4" long hex head bolts. A little grease on the bolt will keep the threads from gauling. The glue will be 100% set in 7 days.
Step 12 - The same procedure is used to install the Stand-off pad. See figure #11.
Step 13 - The next step is to install the davit heads on the back of the yacht. First hold the davit head on the spot that lines up with the rubber pad on the inflatable. **Note: tie a string to the heads, so
you don't have to get a diver to retrieve one.**
Step 14 - Mark and drill the holes. Insert the 2" long bolts provided (or longer ones as necessary) through the holes and secure the davit head from under the swim platform with the nuts provided. It is
important at this point that you attach the mounted davit head to your inflatable pad.
Step 15 - Next, hook the remaining davit head to the dinghy and mark where the holes will be drilled in the swim platform. Drill the holes for the second davit head and insert the bolts and tighten nuts
provided. On integrated swim platforms you may have to follow a different procedure for installation. Call your dealer or Weaver Industries to find out how to install on an integrated swim platform.
Step 16 - You are now ready to pivot the dinghy to a vertical position to secure it to you boat. It is recommended that The Original Weaver Stand-Off Brackets be installed. This simple method consists
of a set of rubber pads which are glued in a similar manner as the davit pads to the inflatable. The Stand-Off Brackets are than installed on the back of the yacht and are used for attaching to the clips on the inflatable.
Step 17 - The swivel end of the Stand-Off Bracket is attached to the transom of the yacht. An extra set of clips are provided for attaching the Stand-Off Bracket back to the transom when not in use.
Smart VIP Price Promise
Our prices are very Smart at Smart Marine! Our Smart VIP Membership and committment to great deals makes sure of that, but if you find a lower price, tell us- we will match it!*

Price Promise Terms & Conditions
- Excludes limited time specials, clearances, non-stocked products, overseas websites, price comparison websites and eBay/TradeMe.
- Applies to identical products, in stock in NZ with pricing valid at time of price match request and purchase, with evidence supplied.
- Excluded Products: clearance, run-out, distress, damaged/soiled, parallel imported, non-stocks, trade quotes, commercial quantities, credit account holders, insurance claims, services, typos, overseas websites, price comparison websites, auction websites.
- Free product, offers, sales and promotions cannot be redeemed with price matches.
- The price match applies to the total cost to buy including shipping, taxes and fees.
- Approved Price Promise Matches and purchases can only be redeemed with our store crew. Please contact your closest store with stock.
- Short term finance may not be available with some price matched purchases. Please enquire.


